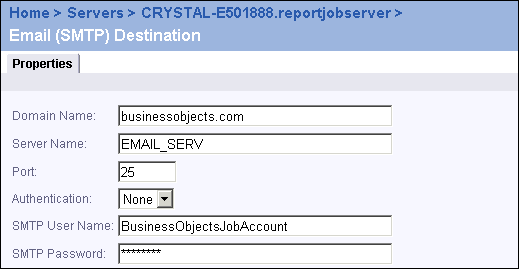
In this example, the SMTP server resides in the businessobjects.com domain. Its name is EMAIL_SERV and it is listening on the standard SMTP port. Plain text authentication is being used, and an account called BusinessObjectsJobAccount has been created on the SMTP server for use by the Job Server.
See also Configuring the destination properties for job servers.
Enter the fully qualified domain of the SMTP server.
Enter the name of the SMTP server.
Enter the port that the SMTP server is listening on. (This standard SMTP port is 25.)
Select Plain or Login if the job server must be authenticated using one of these methods in order to send email.
Provide the Job Server with a user name that has permission to send email and attachments through the SMTP server.
Provide the Job Server with the password for the SMTP server.
Provide the return email address. Users can override this default when they schedule an object.
Set the default values for users who schedule reports to this SMTP destination. Users can override these defaults when they schedule an object.
Add viewer hyperlink to message body
Click Add if you want to add the URL for the viewer in which you want the email recipient to view the report. You can set the default URL by clicking Object Settings on the main page of the Objects management area of the CMC. If you send a hyperlink, the email recipient must log on to BusinessObjects Enterprise to see the report.)
Users can override this default when they schedule an object.
Attach report instance to email message
Clear this check box if you do not want to attach a copy of the report or program instance attached to the email. Users can override these defaults when they schedule an object.
Default File Name (randomly generated)
Select this option if you want BusinessObjects Enterprise to generate a random file name.
Select this option if you want to enter a file name. You can also add a variable to the file name. To add a variable, choose a placeholder for a variable property from the list and click Add.
Adds the .%EXT% extension to the specified filename. This is similar to selecting File Extension from the list and clicking Add. By adding an extension to the file name, Windows will know which program to use to open the file when users want to view the file.
|
|
|
|
| Business Objects http://www.businessobjects.com/ Support services http://www.businessobjects.com/services/support/ Product Documentation on the Web http://support.businessobjects.com/documentation/ |